Tuesday, February 26, 2008

CyberFyber

Fiber artist Susan Lenz is putting together a show entitled, "CyberFiber" and part of it will include 163 fiber art postcards from artist that also blog. She had an open invitation to anyone who blogged, so I signed up!

Susan actually made 163 postcards herself, and then each artist could chose one of Susan's postcards to get in exchange for theirs. I chose her postcard #154 and it arrived in an amazingly short time:


It took me a couple of days to send my "Amoeba" postcard back to her because my toddler tinkered with my sewing machine and now it won't run. I had to take my fabric, backing, and thread to a friend's house to finish the edges.
I've got several "Amoeba" pieces of different sizes. They came from our SpirARTuality group's summer fabric painting day. When I painted, I taped on 3-4 layers of fabric, and the Amoeba fabric are the ones that were nearest the bottom of the pile. Only bits and spots of fabric soaked through. I really love the look of it. I then take simple thread and sew around the blobs:
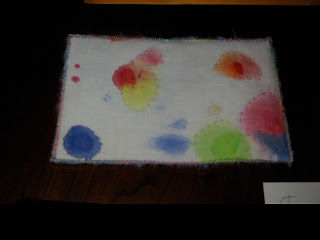

My work is going to be in a show! (With a thousand other artist, but it's still exciting.) Thanks, Susan!!!

Paper Fabric Notebook Covers

The SpirARTuality women made journals out of our Fabric Paper (Paper Fabric?).

1) Measure your notebook. Decide whether you want to just cover the front, or wrap around. If you want to wrap around, make sure to measure the book while closed so you have enough fabric to cover the closed spine.


2) Put glue all over the cover. We found Tacky Glue to work just as well as the smelly lethal stuff:
3) Cut your fabric paper to size and glue onto notebook:


Here's another example if you're feeling a little less dramatic than I was that day:
I love that it's using a pattern piece. Delightful!!

Making Fabric Paper

Our February SpirARTuality task was making Paper Fabric (or is it Fabric Paper? I don't really know) with MistyFuse.

1) Lay Parchment Paper on your work surface.
On top of that, I put down a layer of scrap fabric as my base, then a layer of MistyFuse, then this tissue paper, and ironed:


2) Next, another layer of MistyFuse. Sprinkle on more stuff,
Protect your iron by covering with parchment before ironing:


3) Repeat step 2 another 2-4 times.

4) When your collage is done, top with a layer of MistyFuse and a single layer of netting, tulle, etc:

See next post for final product.

My friend Jo loves MistyFuse. I didn't care for it all that much. It drapes really well, but I like my fuser to be stiffer so it's not always making wrinkles or scooching out of place. I'd use MistyFuse again, but wouldn't pay more for it than WonderUnder.